Smell My Olive Pits

A blog dedicated to my love affair with all things food

Pistachio, fig and lemon biscotti May 27, 2009

Filed under: Cookies,Nuts — smop @ 9:45 am

Baking isn’t something that is automatically considered to be healthy, and generally speaking, it isn’t.  I mean, who are we kidding when we know exactly how much butter, sugar, flour went into making that cake.  But over the last couple of years where people have become more health conscious, I think baking has become healthier — there are recipes that have less sugar, less fat, use whole wheat flour or try substitute ingredients to deliver the cake, muffin or cookie as we know it but healthier.   I think it’s amazing — not only in the ‘progression’ of baking sense but the fact that everyone can still enjoy baked treats a bit more freely.

I was trying to find something to bake for someone who was diabetic, and there are certainly a lot of desserts out there.  However, a lot of them suggested using Splenda in replace of normal sugar.  After researching a few reviews for these recipes, I was a bit skeptical of how it would turn out as most of them talked about an odd aftertaste with Splenda and I had never cooked with Splenda before.  In the end, I went to my trusty recipe source (Taste.com) and found this recipe under a diabetic friendly recipe collection — a pistachio, fig and lemon biscotti.   The bonus with this is that I didn’t have to use butter!

Shelling the pistachios was awfully tedious, but worth it for the bright green colours dotted in the biscotti.  They didn’t turn out as crisp as I like my biscotti, but they still tasted pretty nice, and the natural sugar of the figs gave the biscotti enough sweetness.  Having it with a nice pot of herbal tea made it a great afternoon snack.

fig&pistachio biscotti

Pistachio, fig and lemon biscotti
Makes about 30

Ingredients

  • 1/3 cup pistachio kernels
  • 3 egg whites
  • 1/3 cup caster sugar
  • 1 tbs finely grated lemon rind
  • 3/4 cup plain flour, sifted
  • 1/3 cup finely chopped dried figs

Method

  1. Preheat oven to 180°C.  Brush a 7 x 25cm (base measurement) bar pan with melted butter to lightly grease.  Line the base and 2 long sides with non-stick baking paper, allowing it to overhang.
  2. Place pistachios in a heatproof bowl.  Cover with boiling water and set aside for 5 minutes or until skins soften. Drain.  Peel off skins and dry on paper towel.
  3. Meanwhile, use an electric beater to whisk the egg whites in a clean, dry bowl until soft peaks form.  Add the sugar, one spoonful at a time, whisking well after each addition, until sugar dissolves.  Add the lemon rind and whisk until combined.
  4. Combine flour and figs in a bowl. Use your fingers to separate figs and coat in flour. Fold fig mixture and pistachios into egg-white mixture until just combined.
  5. Spoon mixture into prepared pan and smooth the surface. Bake in oven for 30 minutes or until cooked through. Turn onto a wire rack and set aside for 1 hour or until cooled to room temperature.
  6. Preheat oven to 160°C. Use a serrated knife to cut loaf crossways into 5mm-thick slices. Place in a single layer on a baking tray. Bake in oven for 10 minutes or until crisp and golden. Cool on tray.
 

Cantonese wontons May 24, 2009

Filed under: Chinese — smop @ 2:20 pm

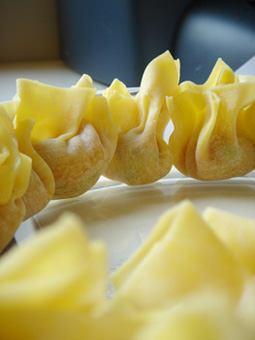
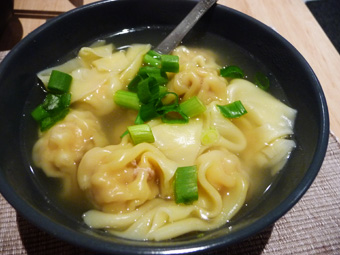
Mum is the wonton / dumpling lover in the family.  She loves making them just as much as she loves eating them.  Often, she’ll make a large batch that goes in the freezer and will be eaten gradually over the next week or two. When I used to live at home, and whenever I go back home, Mum recruits me into helping her wrap them, and between the two of us, we’d end up with a hundred or so wontons made in less than half an hour.  She went through a phase of testing out using varying ratios of pork and prawn, using chives, adding shitake mushrooms, using wombok or diced bokchoy, adding ginger ‘juice’, using minced ginger, and adding other Chinese things that I have no proper English translation for.  The final verdict is that she believes that the ginger juice is the crucial thing in making dumplings taste good, and I don’t disagree — Mum’s wontons are delicious.  Mum tends to buy pork meat and mince it up in her 24 year old food processor.  I don’t have that luxury, nor the elbow grease to mince up pork with one knife.

dumplings1

dumplings4

Cantonese wontons

Ingredients
As I am guided by instinct than measurements with cooking this, the following amounts are rough (but close) estimates.  The best thing to do is that once everything has been mixed, to wrap one and cook it to check that the seasonings is to your taste.

  • 300g pork mince
  • 200g prawns (after shelling)
  • 2cm knob of ginger, minced (or squeeze the juice out of the minced ginger and use that instead)
  • 1.5 tsp of chicken stock powder
  • 2 tsp of soy sauce
  • 1/4-1/2 tsp of sesame oil
  • 1 egg white
  • 50-60 wonton wrappers

Method

Prepping the mixture

  1. Place pork in a large bowl (preferably not metal).
  2. Wash prawns, devein prawns, and cut into small (~0.5cm) pieces.  Allow to drain, and pat dry.  Add to pork mince.
  3. Add minced ginger or ‘ginger juice’ to the pork and prawn mixture.
  4. Add chicken stock powder, soy sauce, sesame oil and egg white.  Mix everything well.  I find that chopsticks are the best tool for this, but anything would do.  As you keep mixing, you’ll find that the mixture starts to come together and becomes a bit more sticky, and that’s when I judge it as being ‘well-combined’.
  5. Gladwrap mixture and let the flavours develop for at least 30 minutes (if more, I would pop the mixture in the fridge).

Wrapping the wontons

  1. Flour a large plate that will be big enough to fit into a freezer (just in case you’re not cooking them immediately).
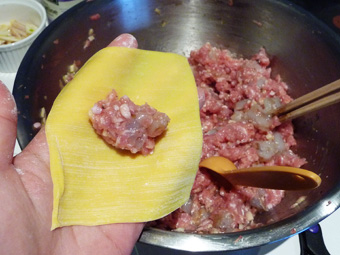
  2. Take 1 wonton wrapper and place a heaped 1/2 teaspoon in the middle.  (Make sure there isn’t too much filling otherwise it’ll burst or spill out when you bring the corners together.)  With one hand, bring all the corners together.  To ‘close’ the wonton, use your other hand and give the wonton a good squeeze just where the ball of filling ends – trying to get as close to the filling as possible but not squeezing any filling out.  If you give it a good enough pinch, the wonton will stick together because (as my mum tells me) of the egg white and the moisture in the mix.  However, if you do find that the wontons are coming apart, dab the wonton skin just outside of where you place the filling with some water before squeezing it shut.
  3. Repeat until all the filling or wrappers are used up, and place on the floured plate making sure that they’re not touching each other.  (I usually wrap one and cook it so I can taste it and adjust the seasonings before I wrap another 5o of them.)

With practice, you will be able to get it so that there is just the right amount for the number of wrappers.  (I prefer to err on the side of having too much filling as unused filling can be made into meatballs or stir-fried with veggies).

Cooking the wontons

If you are not cooking them immediately, place them in the freezer and let them to harden up (30-45 minutes) before putting storing them properly in the freezer.

My favourite broth to cook this to add some chicken powder, a knob of ginger, a good dash of mirin and a smidget of chilli oil to boiling water.

When the water returns to the boil, add the dumplings.  Stir them around occasionally to make sure they don’t stick to the sides and bottom of the pot.  Regardless of whether they are used fresh or frozen, they dumplings are cooked when the dumplings are floating on top, though I usually give them an extra minute or two after they have floated to the top.

They can be eaten by themselves or served with noodles, and garnished with some spring onions.

dumplings3


Spicy tomato and capsicum chutney May 21, 2009

Filed under: Condiments — smop @ 4:54 pm

I always am inspired on a spur of the moment to cook a particular thing.  I would then happily spend the next couple of hours trying to research as much as possible on whatever I intend on making, deciding on a recipe and getting the relevant ingredients.  I love it, and sometimes I wish I could spend more days doing that, and having a kitchen and ingredients at my disposal.

One morning I woke up, looked in my fridge and saw tomatoes.  I didn’t want to eat them in a salad, nor cook it with pasta so I decided that I wanted to make a tomato chutney / relish.  The rest of my morning went to Googling recipes and poring with the few cookbooks that I had brought down from home.

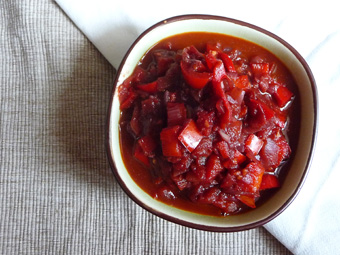
A lot of the recipes I came across required the use of mustard seeds, coriander seeds, fennel seeds and a whole bunch of other spices that I didn’t have, nor could I be motivated enough to go out and buy.  Thankfully, I came across a couple of recipes that received good reviews sans spices.  Sweet.  After reading through a dozen recipes, and getting some idea of the ratio of sweet, salty, tangy and spicy, I decided to just wing the rest of it.  To my surprise, it turned out relatively decent.  There’s certainly much room for improvement, say actually going to the effort of peeling the tomatoes (I was simply lazy), and peeling the capsicums if I were to use them again.  I’m guessing it would help to get that more ‘paste’-like texture that I had visualised in my mind.  Nonetheless, it was great on crackers and went well with poached eggs on toast.

tomato chutney

Spicy tomato and capsicum chutney

Ingredients
Makes ~1.5 cup

  • 3 vine-ripened tomatoes, diced
  • 2 capsicums, diced
  • 1 brown onion, finely diced
  • 2 tbspn of olive oil
  • 2-3 cloves of garlic, crushed
  • 1 tspn chilli flakes
  • 1/3 cup red wine (I’m thinking red wine vinegar could be a substitute)
  • 1/4 cup brown sugar
  • salt and pepper to taste
  • (sterilised jar for storage)

Method

  1. Combine the red wine and brown sugar.  Set aside
  2. Heat a non-stick pan on med-heat.  Pour in the oil to coat the pan.  Add in the brown onions and cook until transparent (3-5 minutes) and starts to caramelise.
  3. Add the capsicums and cook for a few minutes.  Add the tomatoes and cook for a few more minutes.  Throw in the crushed garlic and chilli flakes, and give everything a good stir.
  4. Turn the heat to medium / med-low, and add in the red wine and brown sugar mixture.  Allow to simmer for 30-40 minutes, whereby the mixture should start to thicken up.  If during cooking, it looks a bit dry, add a bit of water.  Season to taste.
  5. When the mixture is reasonably thickened, turn off the heat and allow it to sit in the hot pan for 5-10 minutes.
  6. Pour the mixture into sterilised air-tight jars, and store in the fridge (can be stored for up to 2 weeks)
 

Rosemary and Cheese Focaccia May 14, 2009

Filed under: Breads — smop @ 6:59 pm

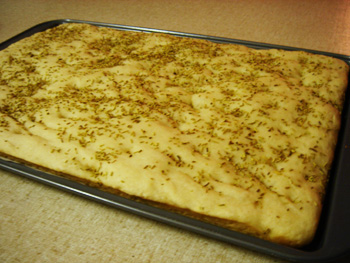
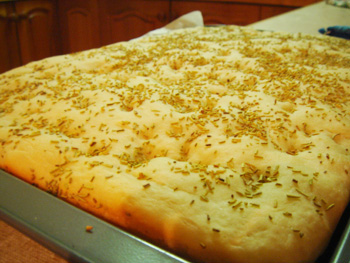
I woke up much earlier than I had planned to one Saturday morning, and couldn’t fall back to sleep.  It was frustrating as the week had left me exhausted and the one thing I was looking forward to was a decent sleep in.  Having a couple of hours to kill until a somewhat decent breakfast hour, I decided to make bread.  Yes, bread.  I don’t know how on earth that thought came about, but once my mind got going on what I type of bread I could make, I was getting excited!  I decided on a focaccia and hunted around for a recipe.  This one from Allrecipes.com seemed to be quite well received, and luckily, I had everything I needed.

Rosemary and Cheese Focaccia

focaccia2

focaccia3

Ingredients

  • 1 1/2 cups bread flour
  • 1 1/2 cups unbleached all-purpose flour
  • 2 teaspoons salt
  • 1 tablespoon white sugar
  • 1 (7g) package instant yeast
  • 1 1/3 cups warm water (45oC)
  • 3 tablespoons extra virgin olive oil, divided
  • 2 tablespoons chopped fresh rosemary
  • 4 tablespoons grated Parmesan cheese

Method

  1. In a large plastic or glass bowl (not metal), stir together the flours and salt.  Make a well in the centre of the flour mixture.  Sprinkle the sugar and yeast into that well.  Carefully pour the water into the well.  Let stand until the yeast begins to act, about 5 minutes.
  2. Pour 2 tablespoons of the oil into the well.  With a wooden spoon stir the mixture in the centre of the bowl. Gradually widen the circle of stirring to take in all of the flour at the sides of the well.
  3. Turn out on a floured surface, and knead just until smooth, adding the rosemary gradually while kneading.  Keep the dough soft.  Pour 1/2 teaspoon of the oil into a clean bowl.  Place the dough in the bowl, turning once to oil the top.  Cover.  Let rise until doubled, 30 to 45 minutes.
  4. Punch the dough down.  Use 1 teaspoon of the oil to coat a baking sheet, and place the dough on the baking sheet. Gently press the dough out to about 1/2 inch thickness.  Pour the remaining 1 1/2 teaspoons oil over the top of the dough.
  5. Use the handle end of a wooden spoon to dimple the dough at 1 1/2 inch intervals. Sprinkle with the cheese (and more rosemary if desired).
  6. Place in a cold oven on the center shelf.  Place a flat pan of hot water on the shelf below the bread.  Let rise until doubled, 20 to 25 minutes.
  7. Turn on the oven to 190oC.  Bake the focaccia for 20 to 25 minutes, or until browned on top.  Remove from the pan, and cool on a wire rack.  Serve warm.

It finished just when the sun was creeping up for a crisp autumn day.  It wasn’t that bad that I couldn’t sleep after all!


Ricotta hotcakes May 10, 2009

Filed under: Breakfast — smop @ 3:20 pm

I can’t remember when or how the hype for ricotta hotcakes started.  It was as if one moment the perfect pancake had only flour, butter, milk (or buttermilk) and eggs, and the next, to be perfect, it had to have ricotta and egg whites beaten to stiff peaks.  And quite rightly so, because ricotta hotcakes are just so damn delicious!   If I didn’t find the process a bit too much for when I’m still blurry eyed and I had the foresight to have a tub of ricotta on hand, I would make ricotta hotcakes everytime I went to make pancakes.  Though, making them only once in a while has its appeal too.  I’ve only tried Bill Granger’s recipe for it seeing as his hotcakes are just as famous as his scrambled eggs, and also because I love the guy’s cooking.

ricotta hotcake2

Ricotta hotcakes
Serves 4-6

Ingredients

  • 1 1/3 cups ricotta
  • 3/4 cup milk
  • 4 eggs, separated
  • 1 cup plain (all-purpose) flour
  • 1 tsp baking powder
  • pinch of salt
  • 50g butter

Method

  1. Place ricotta, milk and egg yolks in a mixing bowl and mix to combine
  2. Sift the flour, baking powder and salt into a bowl.  Add to the ricotta mixture and mix until just combined.
  3. Place egg whites in a clean dry bowl and beat until stiff peaks form.  Fold egg whites through batter in 2 batches with a metal spoon
  4. Lightly grease a large non-stick frying pan with a small portion of the butter and drop 2 tablespoons of batter per hotcake into the pan (avoid overcrowding!)
  5. Cook over low-med heat for 2 minutes or until hotcakes are golden.
  6. Turn onto other side and cook until golden and cooked through.

The batter can be kept for 24 hours in the fridge (covered with plastic wrap).   Bill serves them with a honeycomb butter, though of course, it’ll go well with maple syrup or lemon and sugar, a dollop of strawberry conserve… This time when I made them, I really did plan in advance as I had made some lemon curd the day before, and the pairing was absolutely sublime.  Shall post up the recipe for the lemon curd soon!

ricotta hotcakes


Green chicken curry May 8, 2009

Filed under: Chicken — smop @ 12:16 pm

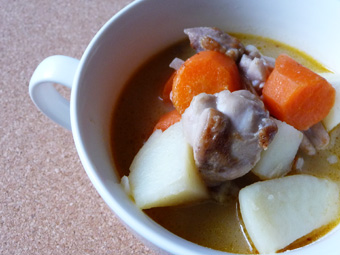
Ever since I wasn’t able to buy Lee Kum Kee’s Portugese curry sauce about two years ago (I forget when), I stopped making curries.  A dish that I would have made roughly once a month, I completely stopped doing them.  It sounds bizarre, but without LKK’s Portugese curry sauce, a curry wasn’t a curry — despite all spices, the red and green curry pastes out there.  It was a time before I really knew about food.  Then, last year, having plenty of spare afternoons I got into watching cooking shows, and on cooking shows, they tend to make curries, and they make them using everything but LKK’s Portugese curry sauce.   Watching them make it, and hearing them them talk about it (as much as they were likely to be inflating how great it was) was enough to get me into cooking curries again, and since then curries have been put back on the dinner menu.

curry

Green chicken curry
(The amounts in this recipe are rough estimates as I usually make my meals off the cuff, though I’d say they are relatively good estimates.)

Ingredients

  • 400g chicken thigh, cut into roughly 2cm pieces
  • salt and pepper
  • 1 tablespoon soy sauce
  • 1 tablespoon cornstarch, optional
  • 2 tablespoon olive oil
  • 1 medium brown onion, sliced
  • 2 potatoes, peeled and cubed into 1.5 cm pieces
  • 2 carrots, peeled and roughly chopped
  • 1 1/2 tablespoon green curry paste
  • 300 mL coconut milk
  • 200 mL chicken stock
  • bit of sugar
  • 1 teaspoon of chilli oil or chilli flakes (as I like a bit more kick in my curries)

Method

  1. Marinade chicken in soy sauce, salt and pepper for about 15-20 minutes.
  2. Meanwhile, fill a medium pot with cold water and place potatoes and carrots into the pot.  Bring the pot to a boil and turn the heat down so that it is just simmering.  Stir occasionally to ensure even cooking.  Simmer for 15 minutes, drain and set aside.
  3. Heat a non-stick frying pan on med-high heat, add the oil and swirl around to coat the pan.
  4. (Add the cornstarch, if using, to the chicken)
  5. Add the curry paste, being careful as it can splatter, and cook for about 30 seconds.  Add the chicken and let it seal on both sides.
  6. Add the onions, and once the onions have softened slightly, add the coconut milk and stock.
  7. Add the drained potatoes and carrots, and bring to a simmer.  Add about a teaspoon of sugar and the chilli oil or chilli flakes.
  8. Cooking for another 10-15 minutes to allow the flavours to develop.  Serve with steamed rice.

According to the cooking shows I watch, the purpose of frying off the curry paste is so that the fat from the paste is separated and floats to the top, thereby allowing the spices that are in the paste to get cooked and therefore to really come out with a punch.  As with the sugar, I’ve always been told by my mum that sugar enhances and complements a curry, the chemical basis for which I don’t know but I guess it would not be unlike the pairing of salt with chocolate.

This has become my standard recipe for a quick midweek curry and usually makes enough to last me for 3-4 meals.  Like all curries and foods packed with a myriad of flavours, with each day, the dish becomes more flavoursome.  The photo doesn’t do it justice to the intensity of flavour this dish has — when I go around to making it again, I might take another photograph of it.


Spicy Green Beans May 4, 2009

Filed under: Uncategorized — smop @ 9:51 pm

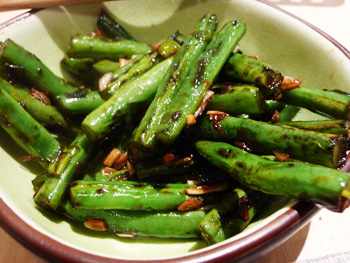
The first time that I remember having really good green beans was at a Malaysian restaurant where they cooked them with sambal and prawns.  That was also when I fell in love with a good plate of green beans.  I’m always sold by green beans with minced pork, green beans with char-siu, green beans with chicken or green beans by itself.  Cooked well, they are beautifully tender, crunchy and with that delicious vegetable sweetness.  For an unassuming slender green thing, it is pretty impressive.  I have tried replicating versions of this dish at home, and have never been able to get it right.  Having bought a bag of green beans on impulsive because it was on special and then, quite coincidentally, coming across this recipe, I decided to try again, and I think I have found the recipe.

green-beans

Spicy Green Beans
(Slightly adapted from Baking Addiction who slightly adapted hers from The Paupered Chef)

Ingredients

  • 2 tablespoons soy sauce
  • 1 tablespoon white vinegar
  • 1 teaspoon sugar
  • 1/2 teaspoon chilli oil (or you could use chilli flakes)
  • 2 tablespoons oil
  • 350 grams green beans, topped and halved lengthwise
  • 2 spring onions, sliced however way you want
  • 2 medium cloves of garlic, minced

Method

Make sure everything is all prepared and ready to go before throwing things in the pan as it’ll only take a few minutes to cook everything.

  1. Combine the soy sauce, white vinegar, sugar and chilli oil or red pepper flakes in a small bowl and mix well
  2. Place a non-stick pan or wok over high heat until it is nearly smoking.
  3. Coat the bottom of the pan with the oil and add the green beans.  Cook until they are tender (about 4 minutes) stirring every 30 seconds or so.  They will get black dots all over them, and look like they’re going to shrivel up and burn but be patient, they will cook and they won’t burn.
  4. Add the spring onions and toss everything around for a minute or two
  5. Add the garlic and cook just until it becomes fragrant (few seconds) .
  6. Add the soy sauce mixture.  Cook for another half minute, tossing and stirring while doing so, turn off the heat, and serve.

Great as a side dish or with some chicken or minced pork added to it.

Versatile much?

I think so.


Apple crumble April 25, 2009

Filed under: Dessert — smop @ 10:20 am

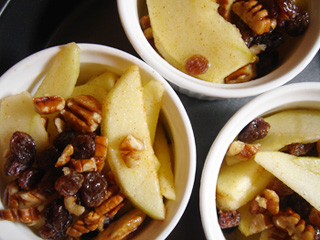
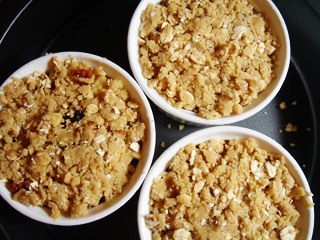
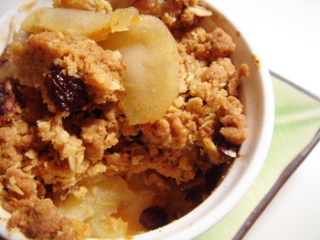
I have this perhaps slightly peculiar habit of having to use things up after a certain period of time — it annoys me a bit having random bits of everything sitting in the fridge.  It may not be a surprise then that I love having a fully stocked pantry.  Anyway, I had 1 apple and a knob of butter to use up, and coincidentally, I had been brewing an apple crumble craving all day.  Checking I had oats and sugar, I researched recipes online.  This was inspired by a number of different recipes seeing as I only had 1 apple and many used 4-5.  I have posted the recipe for 4 serves below, as I would dare to say that one would certainly not be enough!

crumble1

crumble2

Apple crumble

Ingredients

Filling

  • 4-5 apples, peeled and roughly chopped into bite sized pieces
  • 4-5 tablespoons of caster sugar
  • juice of half a lemon
  • (optional) pecans / walnuts / sultanas – personal preference

Crumble

  • 90g butter, cold and cut into 1.5 cm cubes
  • 1/2 cup of tightly packed brown sugar
  • 1 1/4 cup self raising flour
  • 2/3 cup rolled oats

Method

  1. Preheat oven to 180C.
  2. Mix all the filling ingredients in a bowl.  Divide into ramekins leaving about 2cm at the top.
  3. In another bowl, rub the butter, brown sugar, self raising flour and oats together.  Divide evenly between ramekins.
  4. Pop ramekins onto a baking tray and place in the preheated oven for 25-30 minutes, or until the top is golden.  After taking them out, let them stand for about 5 minutes before serving.  Delicious served with ice-cream or custard.

Unfortunately I didn’t have icecream to serve it with, but on its own, it was equally divine.

crumble3


Glazed lemon cakes April 21, 2009

Filed under: Uncategorized — smop @ 10:44 pm

I don’t know what it is about lemons and its use in sweet, and savoury things that makes me love it so much.  Perhaps its the tang that livens up the dish (and myself), or that by having two opposing flavours, makes each one stand out a bit more.  I had a couple of lemons donated to me from a kind person’s tree, and the possibilities of the things I could make were endless:  lemon tart (my favourite dessert of all time), a lemon drizzle cake, lemon muffins, lemon zest cookies … In the end, I settled on a lemon glaze cupcake.

cupcake5

Glazed lemon cakes
(kudos to Martha Stewart)

Ingredients

For the cakes

  • 1/2 cup unsalted butter at room temperature
  • 1 1/2 cups all-purpose flour
  • 2 teaspoons baking powder
  • 1/2 teaspoon salt
  • 1/2 cup low-fat buttermilk or plain low-fat yogurt
  • 1 teaspoon vanilla extract
  • Zest of 1 lemon, finely grated, plus juice, plus
  • 1 cup granulated sugar
  • 2 large eggs

For the glaze

  • 2 tablespoons more lemon juice for the glaze
  • 1 1/2 cups confectioners’ sugar
Method

  1. Preheat oven to 175oC.  Butter and flour a muffin tin or line them with cases.
  2. In a medium bowl, whisk the flour with the baking powder and salt.  In a small bowl, whisk together the buttermilk, vanilla, and lemon zest and juice of 1 lemon.  Set aside.
  3. With an electric mixer, cream butter and granulated sugar until light.  Add eggs one at a time, beating well after each addition.  With mixer on low speed, add flour mixture in three batches, alternating with two additions of buttermilk mixture.
  4. Divide evenly among muffin cups.  Bake until a toothpick inserted in center of a cake comes out clean, 20-25 minutes.  Cool 10 minutes in tin, then cool completely on a rack.
  5. Set rack over wax or parchment paper.  In a small bowl, stir confectioners’ sugar with remaining lemon juice until smooth. Pour over cakes, spreading to edges with a small knife.  Let set 30 minutes.

I made them and took them to a morning tea and they were well received.  These are good.  They’re crumbly and they ooze of lemon deliciousness.

cupcake1


Yellow split pea ‘pudding’ (馬豆糕) April 19, 2009

Filed under: Chinese,Dessert — smop @ 8:47 am

Something inspired me while I was in HK to venture into making Chinese desserts.  Perhaps it was knowing that I wouldn’t have an oven for a good chunk of the year in the new place, or that it was simply because the recipes seemed simple, homely and tasty.  One of the things that used to make me less inclined to make tasty Asian things was partly because of the effort needed to actually get the things that were specified in the recipe as it would take a couple of visits to different Asian grocers to find the thing I want, and even if they did, the quality would be questionnable (I once saw packets of red beans with mould on them and they were still on the shelves!).

Anyway, with this new found inspiration, and a trusty Asian grocer, I gave another hand at making a popular Hong Kong dessert.  I came across this wandering the streets in HK and in their display cabinet, there were a variety of ‘slices’ for what equated to A$0.60 for 1.   They looked too good not to try, and afterwards, I was hooked on all things with that agar-agar / firm gelatinous texture.  This was the easiest to make, out of of all the ones I want to try, and I love it — it isn’t too sweet, I get a lot from not very much, and it lasts quite well in the fridge for over a week.

yellow-split-pea-pudding

Yellow split pea ‘pudding’ (馬豆糕)

Ingredients

  • 1/2 cup yellow split peas
  • 1 cup cornflour
  • 3/4-1 cup caster sugar (personal preference)
  • 2/3 cup coconut milk
  • 1/2 cup evaporated milk
  • 4 cups water

Method

  1. Rinse the yellow split peas until the water runs clear.  Place them in a pot of cold water and bring to the boil.  Make sure you watch it at this stage as it can boil over really quickly!  Lower the heat so that its inbetween simmering and boiling and wont’ boil over.  Cook for 15-20 minutes.  Pop on the lid, remove from heat and let it stand for 10 minutes.   Drain and set aside.
  2. Mix the cornstarch with 1 cup of water — it feels like it’ll never dissolve at the start, but keep going and it’ll dissolve.  Set aside.
  3. Put the remaining 3 cups of the water into a saucepan and add the sugar.  Bring to the boil.   Add the coconut milk and evaporated milk.  Bring to the boil again.  Add the cornflour mixture and stir vigourously.  The mixture will thicken up considerably at this stage, so it’s important to keep stirring.  Do so for about 2 minutes.
  4. Remove pot from heat and add the drained yellow split peas.  Stir for another minute.
  5. Pour the mixture into a dish or moulds, and place into the fridge for 4-5 hours until set.

Makes a 9 inch quiche dish but fit it into whatever mould you have.